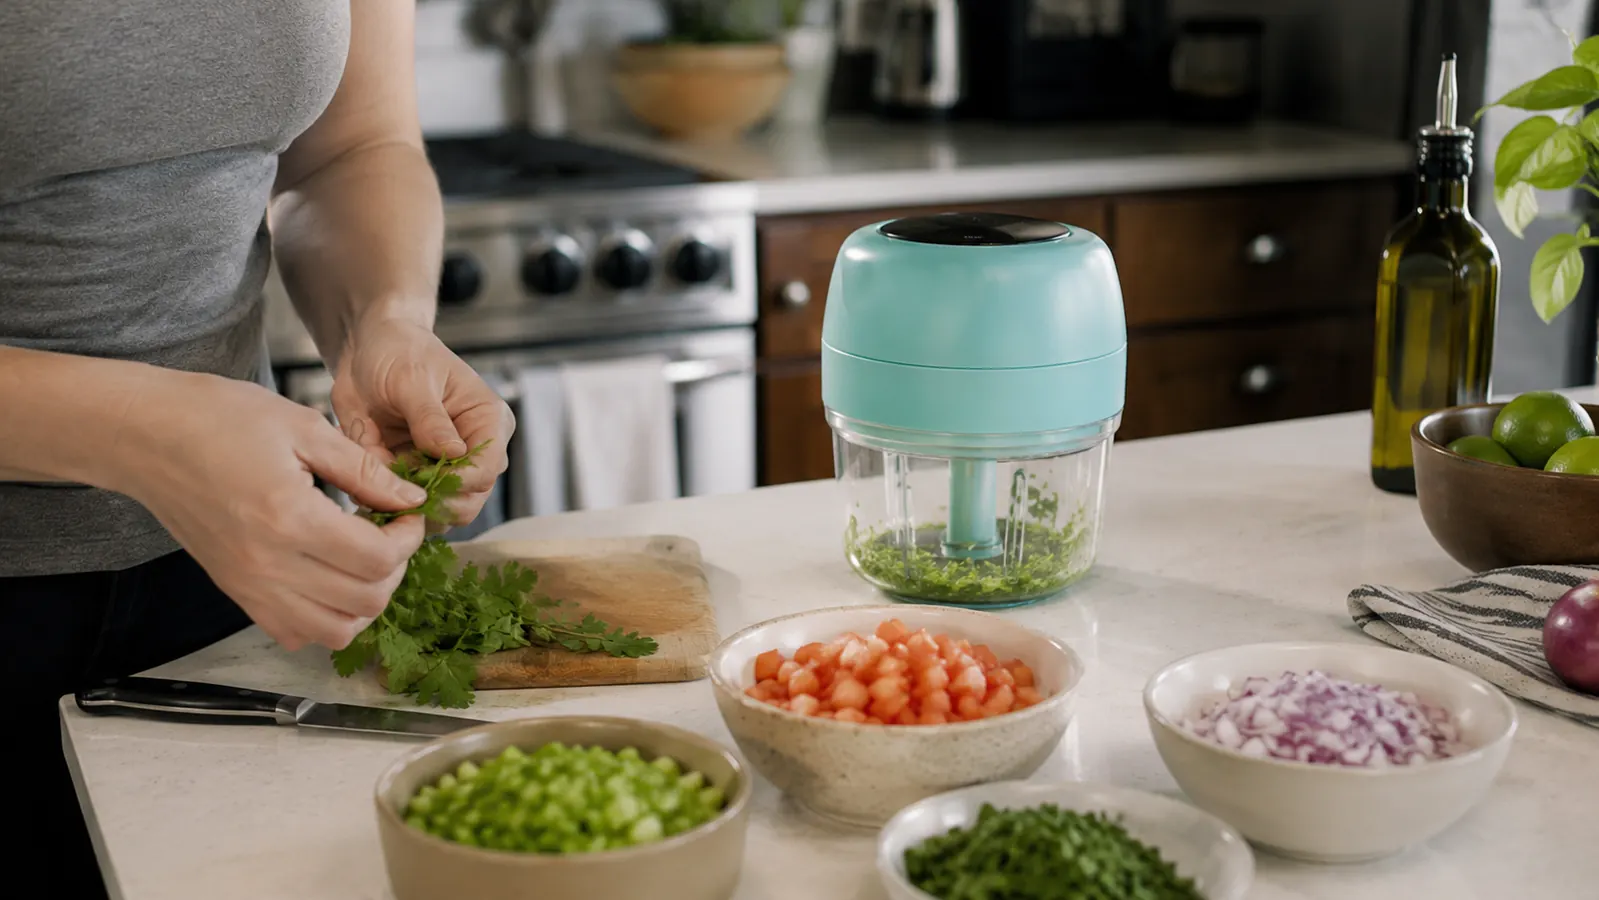
Meal prep sounds great in theory. In practice, it usually dies on the cutting board. You are tired, you have a narrow strip of counter space, and the idea of hand-dicing two onions, four cloves of garlic, a bell pepper, and a pile of herbs for the week feels like more work than it is worth. So you skip it. You cook one meal at a time, every night, which is slower, messier, and more exhausting than it has to be.
I have been there. I cook in a galley kitchen where the counter runs about 30 inches total, and for a long time I assumed a food processor was just not for someone in my situation. Too big, too loud, too many parts. Then I started using the KitchenAid 3.5 Cup Food Chopper, and within two weeks my weeknight routine had genuinely changed. Not because the chopper is magic, but because it removes the single most annoying part of cooking from scratch: the repetitive knife work. This guide walks through exactly how to use it to shave real time off meal prep, which tasks it handles best, and how to set up a simple weekly rhythm that actually sticks.
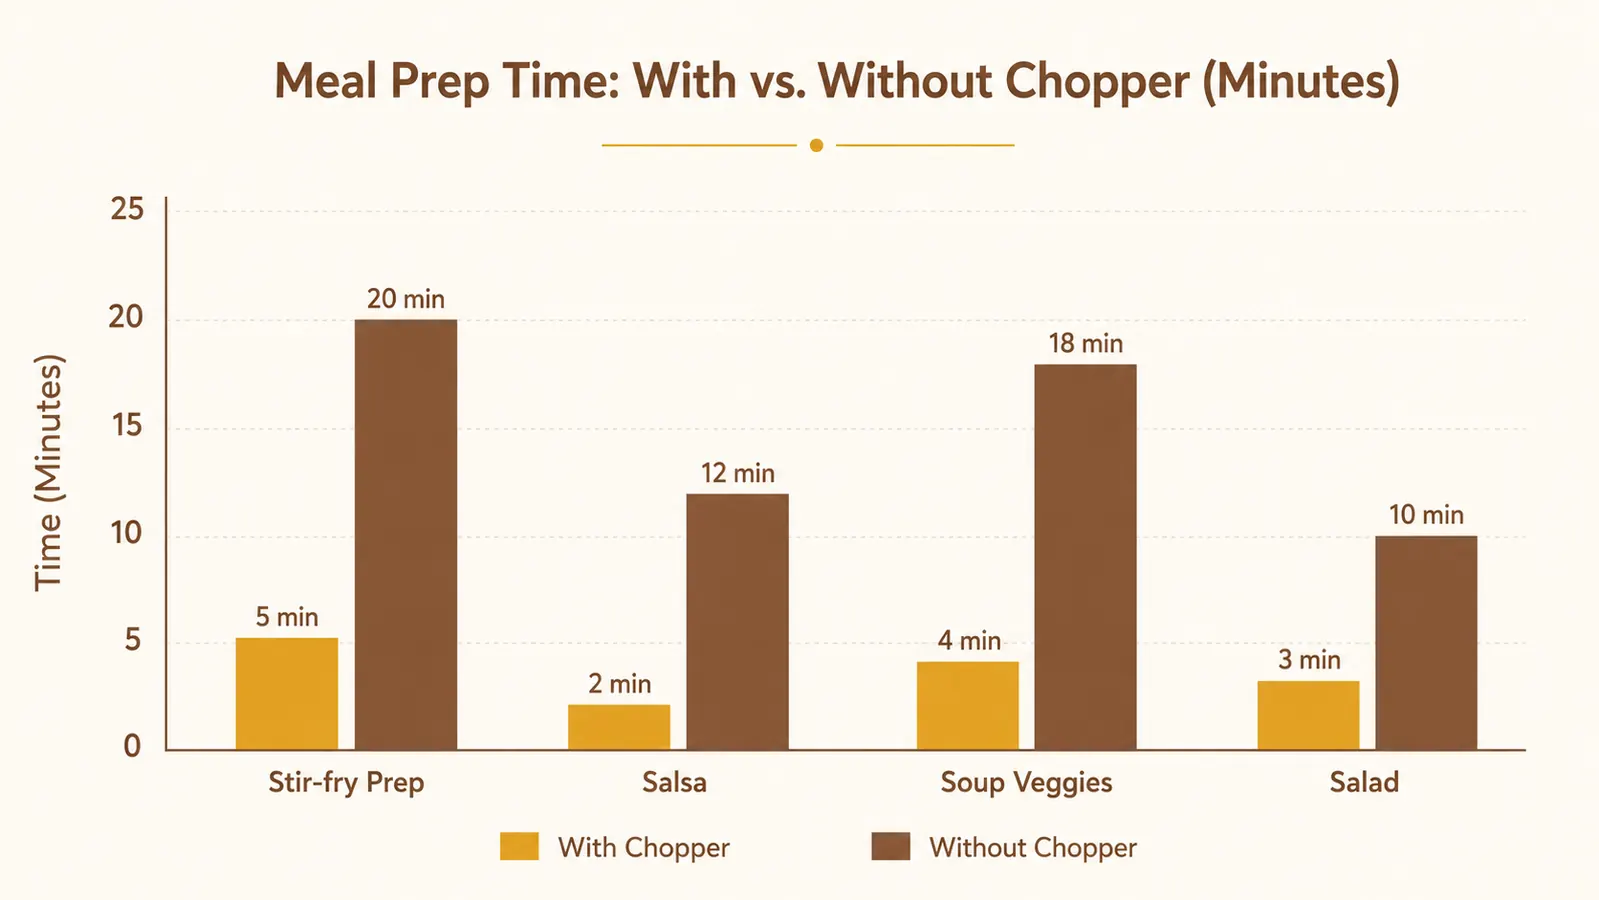
Tired of spending 20 minutes on chopping before you even start cooking?
The KitchenAid 3.5 Cup Food Chopper handles onions, garlic, herbs, and dips in seconds. It earns its counter space in apartments, condos, and any kitchen where time and space are both tight. Over 30,000 reviewers agree it is worth it. Check the current price on Amazon before you keep hand-chopping everything.
Amazon Check Today's Price on Amazon →Step 1: Set Up the Chopper Correctly Before You Do Anything Else
The KitchenAid 3.5 Cup Food Chopper has three parts: the motor base, the stainless steel bowl, and the blade assembly with lid. Before the first use, wash the bowl and blade in warm soapy water and let them air dry. This takes three minutes and makes a real difference in how food releases from the blade later.
To assemble: set the bowl on the base (it clicks into a small notch), drop the blade onto the center post inside the bowl, and place the lid on top. The lid locks by pressing down and turning about a quarter-inch clockwise until it snaps. You will feel it click. If it does not click, the unit will not run. That is a safety interlock, not a defect. Once locked, plug it in and you are ready. The first time through this takes 30 seconds. After a week it is automatic.
One setup habit worth building early: keep the chopper on the counter rather than in a cabinet. At 6.5 inches wide and roughly 8 inches tall, it fits comfortably on most apartment counters and takes up far less space than a full-size food processor. The more friction between you and using it, the less often you will reach for it. Counter access is part of the system.

Step 2: Start With Aromatics, the Task Where the Chopper Pays Off Fastest
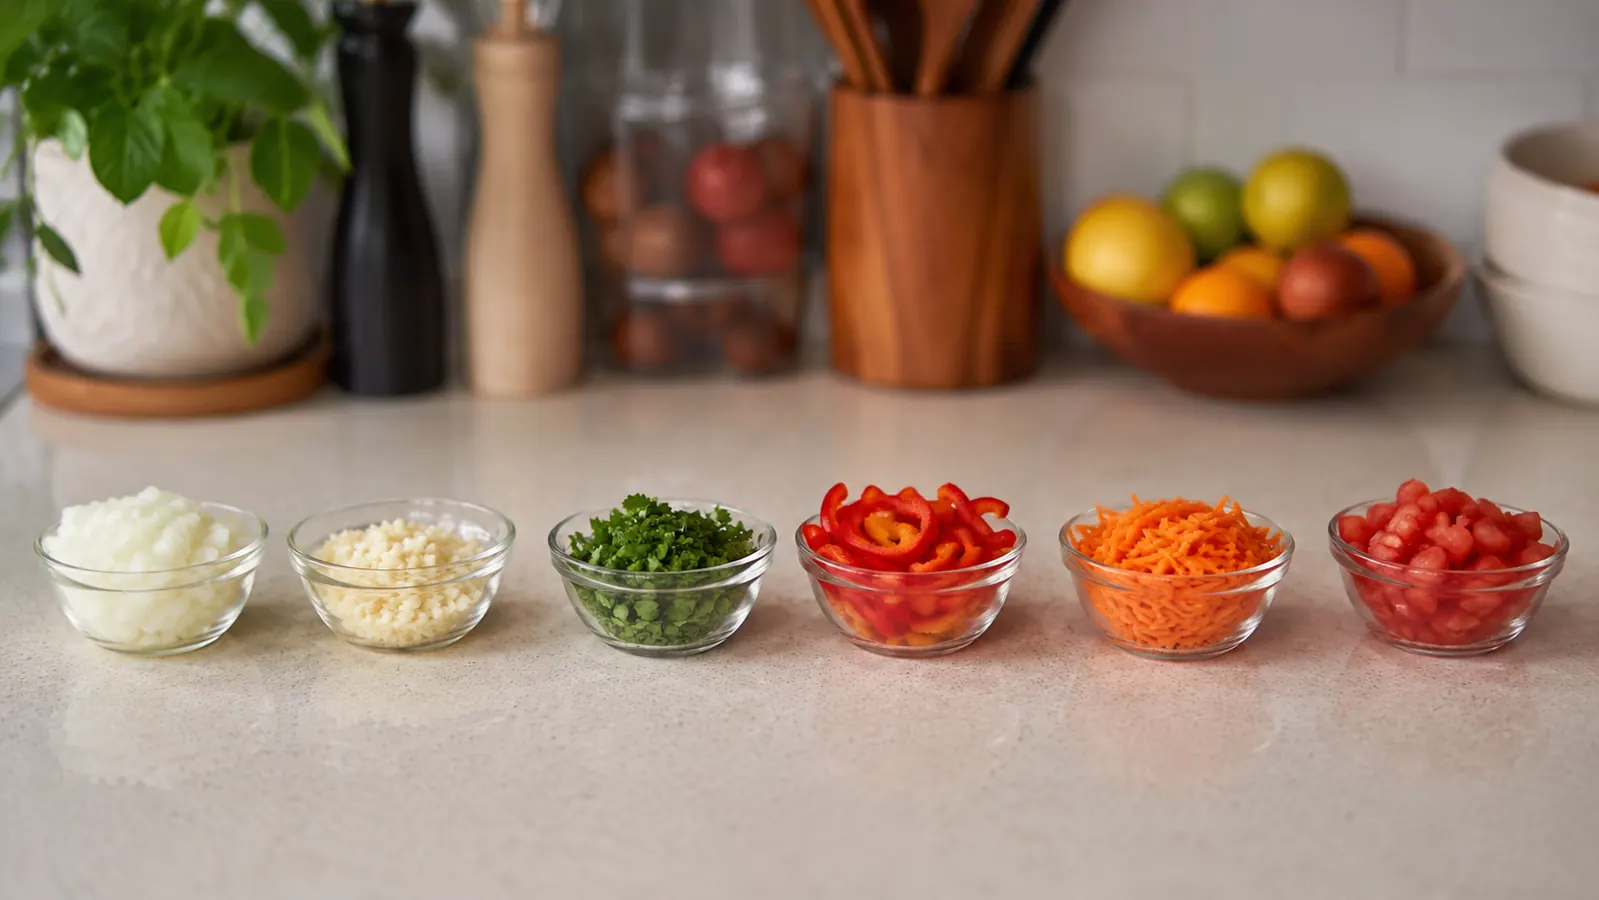
Onions and garlic are where the KitchenAid 3.5 Cup Food Chopper earns its spot immediately. Quarter a medium onion (no need to dice it first) and drop the pieces into the bowl. Put the lid on, press and hold the pulse button for two to three one-second bursts, and check. For a medium dice, three pulses is usually right. For a finer mince, add two more. The bowl holds enough for one large onion or two medium ones, which covers most weeknight recipes.
For garlic, peel the cloves and drop them in. Three to four cloves mince perfectly in two pulses. If you are batch-prepping garlic for the week, fill the bowl to the 3.5-cup line (about eight to ten cloves), pulse four to five times, and transfer to a small jar with a tight lid. Refrigerated minced garlic made this way keeps for five to six days. That is one less thing to deal with every single night.
Bell peppers, celery, carrots, and shallots all follow the same basic pattern: cut into rough one-inch chunks, load the bowl no more than three-quarters full, and pulse in short bursts rather than running the motor continuously. Continuous running leads to uneven pieces where the bottom pulverizes while the top stays chunky. Pulsing gives you control. Two seconds on, pause, check, repeat. It takes a little practice to learn your own chopper but after three or four uses you will have an intuitive feel for it.
Step 3: Use the Pulse Button, Not the Continuous Run
This is the single most important technique tip for this chopper, and the one most people miss when they first get it. The KitchenAid 3.5 Cup Food Chopper has two operating modes: continuous run (hold the power button down) and pulse (a separate button that runs the motor only while pressed). For almost everything you will chop, herbs, vegetables, nuts, breadcrumbs, pulse is the right choice.
Continuous run is best for smooth preparations where you want a uniform puree: hummus, dips, soft cheese blends, or pesto where you are deliberately going for a paste. For anything where texture matters, where you want actual diced pieces rather than mush, pulse every time. The rule of thumb I use: start with three one-second pulses, open the lid, check, then add more. You can always chop more; you cannot un-chop an onion that has turned to slurry.
Pulse in one-second bursts, check after three, and add more from there. You can always chop more. You cannot un-chop an onion that has gone to mush.
Step 4: Make Dips, Sauces, and Spreads in Under Five Minutes
Beyond chopping vegetables, the KitchenAid 3.5 Cup Food Chopper handles a range of quick preparations that replace store-bought products with fresher, better-tasting results. Homemade salsa is the easiest win: rough-chop two Roma tomatoes, half a white onion, one jalapeno (seeds removed if you want it mild), a handful of cilantro, and the juice of one lime. Load everything into the bowl in that order, tomatoes on the bottom so they add liquid that helps the blades move. Pulse five to six times for a chunky pico-style salsa, or eight to ten times for something closer to a jarred consistency. Total active time: under four minutes.
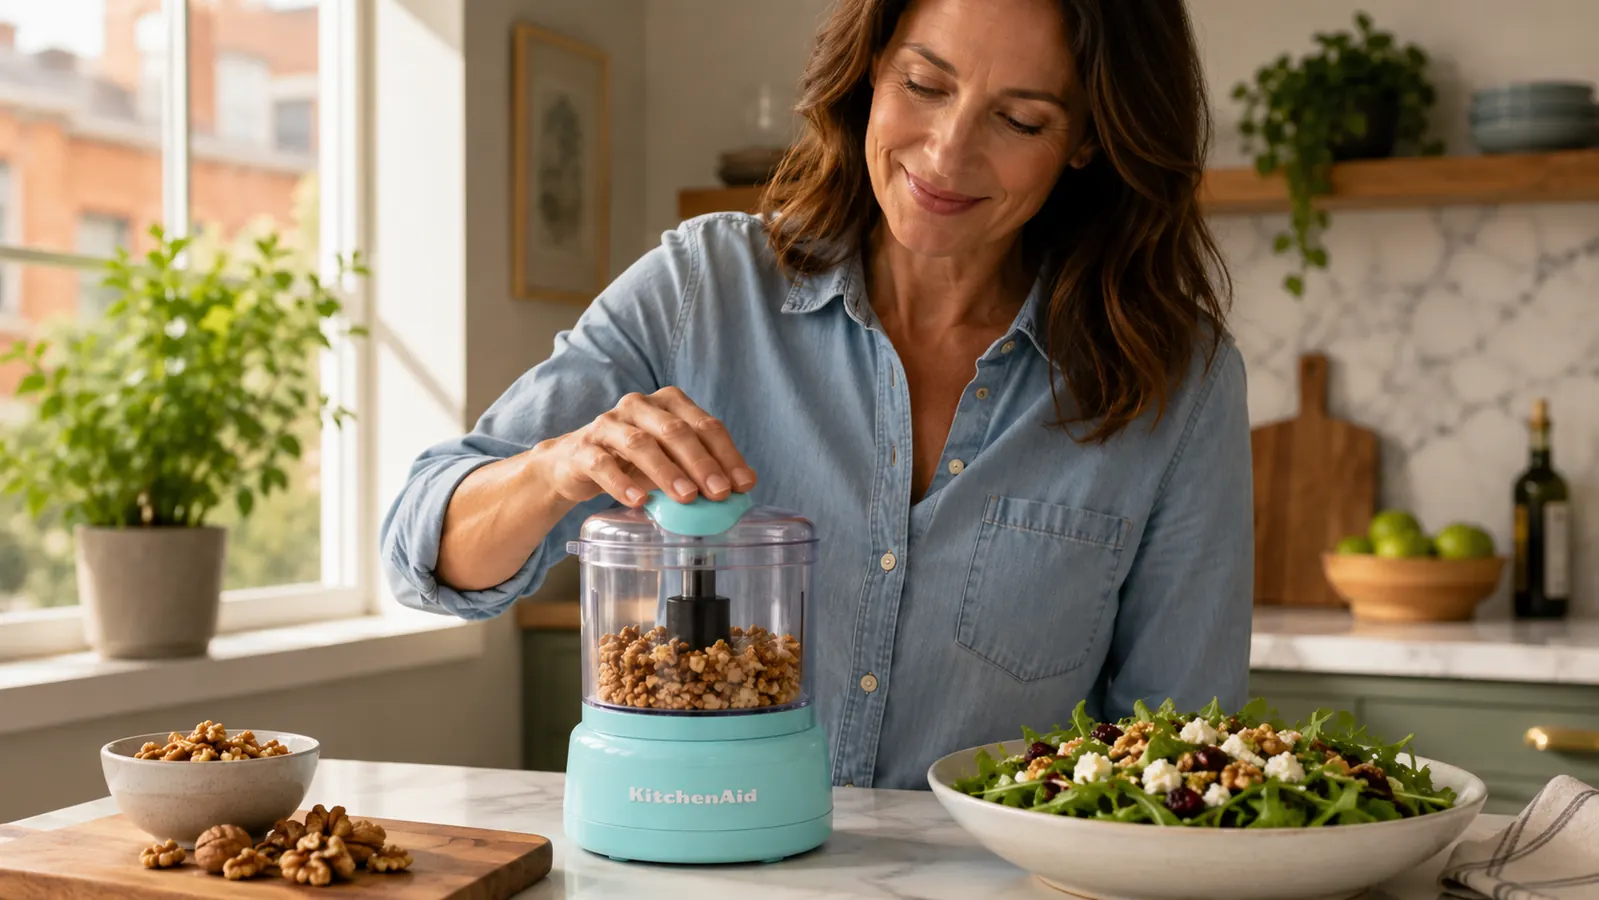
Hummus works well if you start with canned chickpeas and add the liquid (aquafaba) from the can to help it blend. The 3.5-cup bowl is genuinely the right size for a single batch of hummus serving two to three people. Run it continuously for about 45 seconds, scrape down the sides with a spatula, run another 30 seconds, and you will have a smooth, creamy result. Other quick prep wins include pesto (basil, garlic, pine nuts, parmesan, olive oil), breadcrumbs from a stale slice of bread, and chopped nuts for baking. Each takes under two minutes.
The key for dips and sauces: do not overfill. The bowl holds 3.5 cups by volume but works best at two-thirds capacity for wet preparations. Too much liquid and the blade can splash when you lift the lid. Fill to just under the max line for dry ingredients, and stay at the two-thirds mark for anything with significant liquid.
Step 5: Build a Sunday Batch-Prep Routine That Feeds the Whole Week
The biggest time savings from the KitchenAid 3.5 Cup Food Chopper do not come from individual meals. They come from building a short Sunday prep session that stocks your refrigerator with chopped aromatics and bases that make weeknight cooking almost effortless. My own Sunday routine runs about 20 minutes and covers most of what I need for five dinners.
Here is the sequence I use: Start with garlic because the smell lingers and you want it done early. Mince eight cloves, transfer to a small jar. Next, dice two large onions, transfer to a separate container. Then chop whatever vegetables the week calls for: bell peppers for stir-fry, celery and carrot for soups, shallots for pan sauces. Rinse the bowl between each ingredient (takes 20 seconds) to keep flavors from crossing. Finish with any herbs you are using that week. Total: about four bowl loads, four quick rinses, 20 minutes of active work.
With that prep done, a Tuesday night stir-fry goes from 35 minutes to 15. A Thursday soup is just sauteing the pre-chopped vegetables, adding stock, and simmering. The chopper did not cook the meals. It removed the part that makes you not want to cook the meals.
What Else Helps You Get the Most From This Chopper
A few habits make a meaningful difference in the day-to-day experience. First, keep the blade sharp. The KitchenAid 3.5 Cup Food Chopper blade is stainless steel and holds an edge well with regular use, but handwashing it (rather than dishwashing) extends its sharpness significantly. The dishwasher is convenient, but the heat and detergent degrade the blade over time. A 20-second handwash each use is worth it.
Second, process soft and hard ingredients separately. If you put cherry tomatoes in with a raw carrot, the tomato will be liquid by the time the carrot is diced. Chop hard vegetables first, set them aside, then process softer ones. Third, for herbs like parsley or basil, a quick dry with a paper towel before loading helps a lot. Wet herbs tend to clump and stick rather than chop cleanly. Pat them dry first and the chopper handles them in two quick pulses.
If you want to read a fuller picture of how this chopper performs across more tasks and over time, the long-term KitchenAid Food Chopper review covers three months of daily use in detail. And if you are deciding between this and the Cuisinart Mini-Prep, the KitchenAid vs Cuisinart comparison lays out the real differences side by side.
One thing the chopper does not do well: whole spices, ice, and anything frozen solid. The 350-watt motor is sized for food prep, not heavy grinding. Do not use it to crack peppercorns or crush ice cubes. For those tasks a mortar and pestle or a dedicated spice grinder is the right tool. The KitchenAid 3.5 Cup Food Chopper is best at fresh vegetables, soft cheeses, herbs, nuts, cooked ingredients, and wet preparations. Stay in that lane and it will rarely disappoint.
Cleaning It Is Faster Than You Think
One reason people stop using small appliances is cleanup. If washing it takes longer than the prep itself, it ends up in a cabinet. The KitchenAid 3.5 Cup Food Chopper is genuinely fast to clean. The bowl and lid are technically dishwasher-safe (top rack), though as noted above, handwashing the blade extends its life. For the bowl and lid, a 30-second rinse with warm water and dish soap and they are clean. The motor base wipes down with a damp cloth. Total cleanup: under two minutes if the prep was not anything too sticky.
For harder-to-clean prep like hummus or pesto, fill the bowl halfway with warm soapy water, put the lid on, and pulse twice. The blade cleans itself. Pour out the soapy water, rinse, done. I learned this trick about a month in and it genuinely changed how much I use the machine. Any appliance that cleans itself in two pulses gets used more often.
Ready to stop spending your weeknights at the cutting board?
The KitchenAid 3.5 Cup Food Chopper is the small-kitchen tool that quietly makes cooking from scratch feel like less work. At a 4.6-star rating from over 30,000 reviews, it has earned the counter space in a lot of small apartments and condos. Check today's price on Amazon and see what size and color works for your kitchen.
Amazon Check Today's Price on Amazon →